


 Bogdan Cretu
 Thank you for signing up and advertising with Coinzilla! This article will help you better understand our advertising platform and all the tools you can use to boost your project’s marketing efforts. Also, by the end, you’ll know how to create your first Coinzilla crypto campaign.
Table of Contents
Choosing Your Type of Campaign
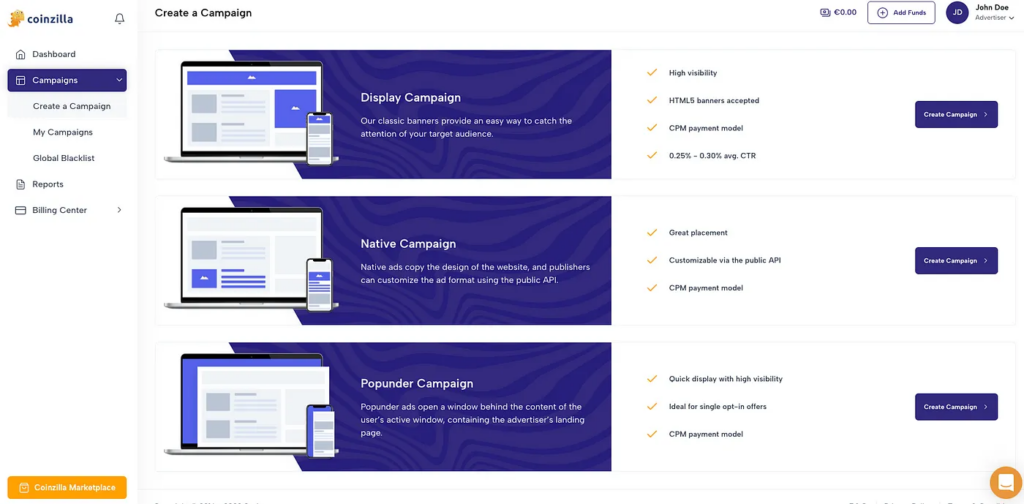
So, let’s dive in and explore the available campaign options and how to set them up. Right off the bat, you must choose the type of campaign you want to run: Display, Native, or Popunder.
Display Campaigns
Display ads are among the most common forms of online advertising. They have been around for more than 20 years, and they can either be static (.png or .jpeg banners) or dynamic (.GIF or HTML5 banners).
Unfortunately, poor practices in the online advertising industry have created a stigma around display ads. However, in a 2016 HubSpot survey, 83% of respondents agreed that not all ads are bad. Yet, they would like to filter out the obnoxious ones.
However, positive interactions with your brand or a well-established online reputation can significantly boost the results of your banner campaign.
When you should use display campaigns:
- When your goal is to create awareness about your brand and product;
- When you want to reach a niche market (in our case, the finance and cryptocurrency market);
- When you want to promote your product visually.
Pro tip: They work great for mobile marketing campaigns.
Native Campaigns
Native ads mimic the design of the website they’re displayed on. This time, instead of uploading a banner, you will provide a few elements for the platform to use to create custom native banners that blend with the design of the hosting page. These elements include marketing texts and media files (.jpg & .png).
Compared to display ads, native ads are much subtler. And by copying the page’s design, they avoid the banner blindness issue altogether.
When you should use Native Ads:
- When you’re looking to be less disruptive toward your audience;
- When you’re willing to integrate your ads with the page hosting the ad inventory;
- When you want to reach our partners’ mobile app audience.
Popunder Campaigns
Popunder campaigns are another excellent tool for generating leads. There are two primary ways of doing so:
- By redirecting a user to a landing page;
- By using a pre-lander (a landing page with a well-crafted CTA).
Even though pop ads make up just 2% of all online advertising, stats prove they are a niche worth investing in.
Popunder ads tend to convert better than banner ads because the audience is more inclined to stay and find more information. But that is directly influenced by the product you’re advertising and the content you deliver to users.
When you should use Popunder Ads:
- When you’re trying to gather leads using a form;
- When you’re promoting a redeemable gift/bonus;
- When you don’t mind being more aggressive with your ads.
Setting Up a Display Campaign
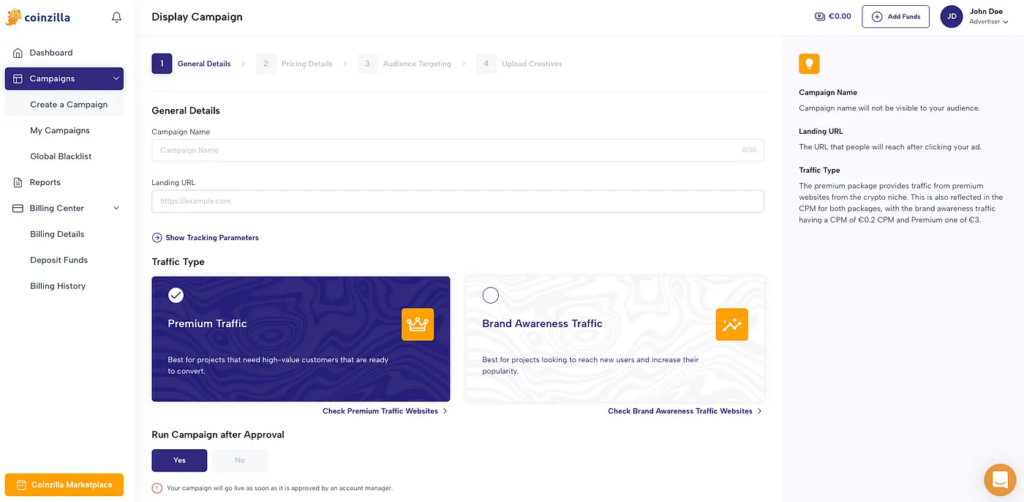
After you decide on the campaign type, review the fields in the General Details section.
Campaign Name
The Campaign Name will not be visible to your audience. You will use it only to track your campaigns and distinguish between them.
Landing URL
The Landing URL field is the page URL where you want your traffic to go. Make sure you use Tracking Parameters. This will help you with the essential data you can see directly in your Google Analytics account.
Let’s take the following example to understand what your URL should look like: https://awesomeproject.com/.
For accurate tracking, you need to use four main information points:
- Website Zone ID {zone};
- Website Domain Name {domain};
- Campaign ID {campaign};
- Banner Size {size}.
Additionally, you can track other parameters with Google Analytics:
- utm_source=
- utm_medium=
- utm_campaign=
- utm_term=
- utm_content=
For the utm_source field, we strongly encourage you to use “Coinzilla” to differentiate traffic from our network from the rest. Your final URL should look something like this:
https://awesomeproject.com/?utm_source=coinzilla&utm_medium={domain}&utm_campaign={campaign}&utm_term={zone}&utm_content={size}
SIDENOTE: Generally, you should use “?” before your first UTM and “&” between your parameters.
Traffic Type
At Coinzilla, for display campaigns, you can choose between two types of traffic: Premium and Brand Awareness. These categories were created based on data such as customer interests or previous online behavior.
Premium Traffic
Premium Traffic is better suited to projects that involve specialized activities or a more complex conversion system, as it targets audiences with profiles of traders, investors, or high-quality customers.
Brand Awareness
Brand Awareness Traffic is recommended for websites where users are more easily converted, such as gambling projects, blog promotions, or social offers.
Pricing Details
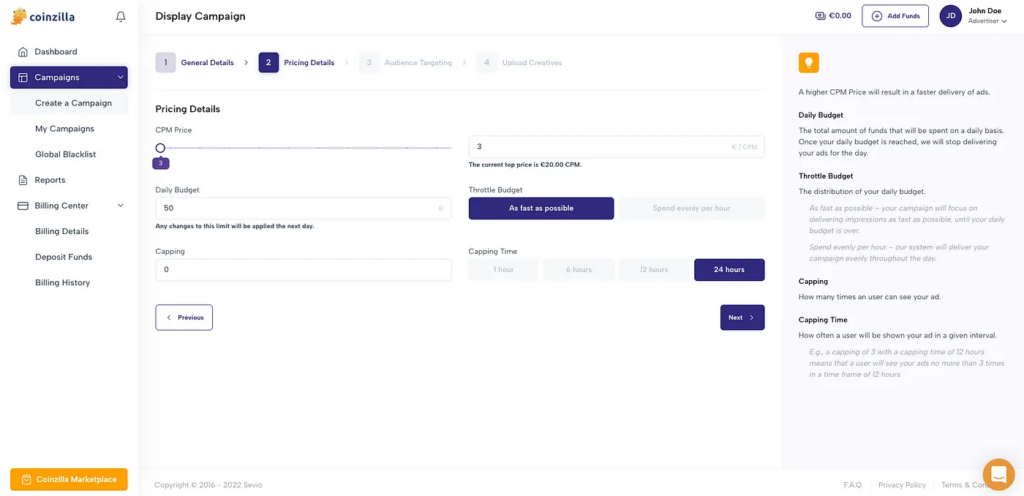
Pricing Details directly impact the delivery of your ads.
Let’s start with the CPM price. On our platform, you will always see the average CPM displayed; however, don’t rely on it blindly. Setting a higher CPM can help you reach your target audience more efficiently, as you’ll have a greater chance of winning the bid. Accordingly, you can adjust your daily budget to maximize your impressions.
But heads up: a higher CPM doesn’t always mean better results. If your ads aren’t converting, check your targeting, creatives, and budget first.
For example, if you set a daily budget of EUR 500 and a CPM of EUR 3, your ads will receive around 100,000 impressions. But if those impressions don’t convert or drive the engagement you’re aiming for, it might be worth testing a higher CPM.
Raising your CPM to EUR 5 or EUR 6 gives your ads a better chance of being shown earlier in a user’s session—when attention is most significant, and engagement rates tend to be stronger. Even if you get fewer impressions overall, the higher visibility can drive better CTRs and more meaningful traffic.
Budget Throttle
The budget throttle tool lets you choose an effective way to spend your ad budget within a campaign. There are two types of budget throttling:
- As fast as possible, prioritize getting your ad in front of as many users as possible until your daily budget is spent.
- Spend evenly per hour to let the system perform. You will split your daily budget per hour and deliver your campaign evenly throughout the day.
Capping/Capping Time
Capping lets you set how many times a user can see your ad, and capping time lets you set a timeframe of 1, 6, 12, or 24 hours. Your campaign will be delivered to users based on your capping settings.
Suppose you want your ad to appear to a single user a maximum of 10 times in 24 hours. In this case, all you need to do is set the platform’s capping to 10 and select a capping time of 24 hours, and you are ready to go.
Remember that your ads will be live only if you have funds in your account; therefore, make sure you fund your account before the start date of your campaign.
Audience Targeting
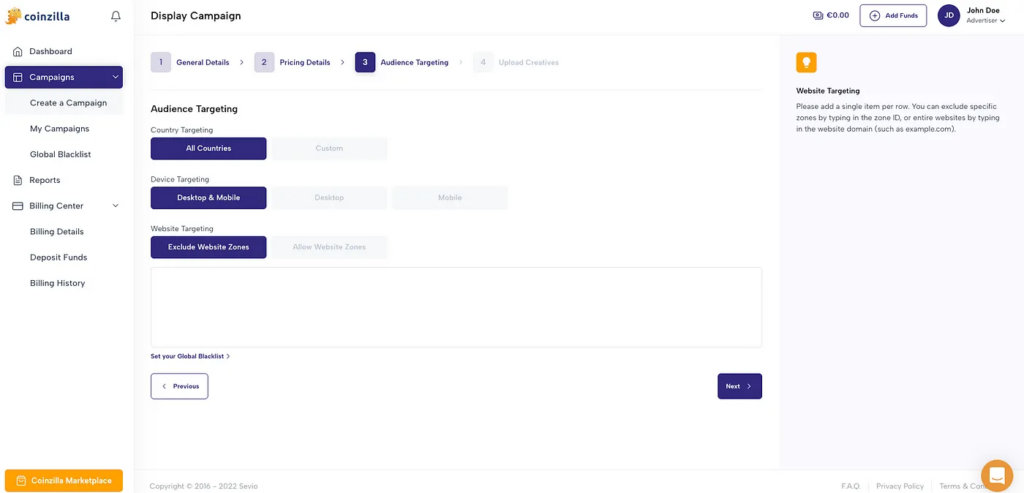
The Audience Targeting section lets you target the people who will see your ad based on three main factors: location, device, and website.
This tool can be extremely powerful when paired with Google Analytics data, as it can help you determine how each campaign and banner performs based on geographic location, user device, and website ad zone.
Let’s look at an example, and say you’re trying to determine whether device type influences goal completions on your website. You’ll want to build a Free Form Exploration report (Custom Report) in Google Analytics 4 to track performance across device types. Here’s a quick setup:
- Head to the Explore tab in GA4 and choose Free Form.
- In the Variables panel:
- Add the “Device category” dimension;
- Add the “Conversions” or a specific event (like form_submit or purchase, based on what you want to achieve) as your metric;
- Add “Users” as a second metric;
- Drag the Device category into Rows.
- Drag Conversions and Users into Values.
Now you’ve got a report showing how different devices are performing. To calculate the conversion rate per device, divide the number of conversions by the number of users for each row. If you’re using custom events, replace it with your event of choice.
SIDENOTE: Don’t know how to set up a custom report? Open GA4, hit the Explore tab in the left menu, and follow the steps above. You can’t break anything—just test, drag stuff around, and see what clicks.
That data can vary based on what you’re trying to track, and you should always be careful with how you extract the data, as it can affect your final result.
Regarding the Websites Targeting section, it needs a little more attention, as it allows you to optimize your campaigns based on two primary options:
- Exclude Website Zone allows you to disable low-performing websites or website zones. For instance, if your banner did not generate an acceptable CTR in the header area of a particular site, you can exclude that ad zone from your ad delivery.
- Allow Website Zone to work in the opposite direction. Suppose your targeted audience finds your banner in the header more engaging, leading to better results. In that case, you can allow your banner to be displayed only in your allowed zones or websites, such as the header.
Each area where an ad is delivered has an ID, which you can get from the Optimization section of your campaign. You can copy that ID into the specific field to exclude or allow a website zone.
In each campaign, you can only use one of the tools. That is, you cannot exclude some areas and allow others. You can opt to exclude specific website zones and have your banners show everywhere else or only allow particular website zones and deliver your banners only where you want.
You can find more stats about your campaigns in the Optimization section.
Upload Creatives
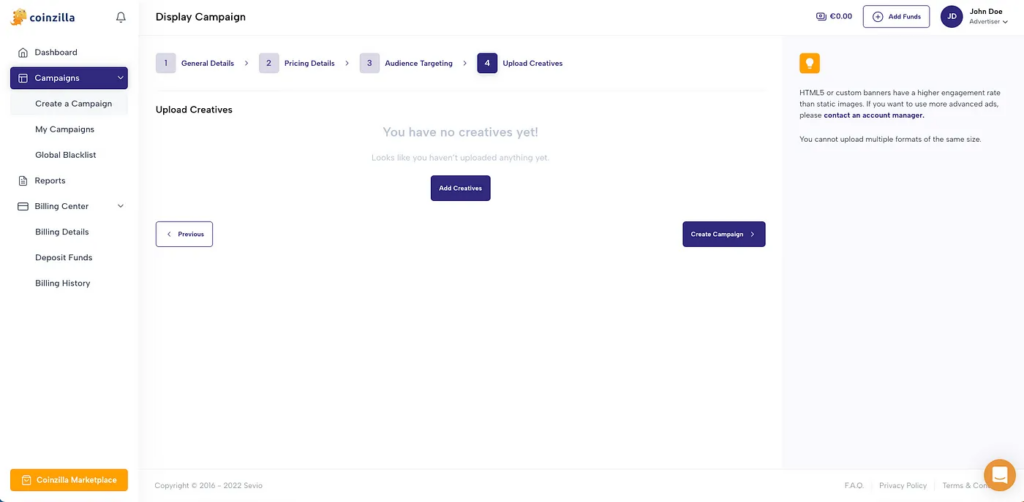
Banners are vital for the success of your campaign. First, decide whether you want a static or animated banner. Thus, people are usually more familiar with static ads and can easily recognize them. However, they also expect amazing experiences across the web. And ads should, just like all types of content, live up to the expectations.
Here at Coinzilla, we prefer animated banners (HTML5 & GIF) because we’ve had better results with them over the years.
SIDENOTE. We work with HTML5 banners but don’t take externally made files. Our team produces every HTML5 asset to avoid technical issues and ensure everything works perfectly across platforms.
But that doesn’t mean there aren’t any instances where a static banner would perform better. For the Display Campaign, you have six sizes to choose from, which are standard dimensions for online ad inventory:
- 300×250;
- 728×90;
- 160×600;
- 300×600;
- 320×100;
- 320×50.
Additionally, there are two exclusive ad formats, Sticky Banner and Header Banner, which you can use by contacting an Account Manager. Remember to use several ad sizes in a single campaign by clicking Add Creatives. After uploading your banners within the campaign, click the Create Campaign button.
SIDENOTE. If you want to start an advertising campaign but don’t have designers available, our team can design custom banners according to your preferences. Check out some examples on our Ad Formats page.
Deposit Funds
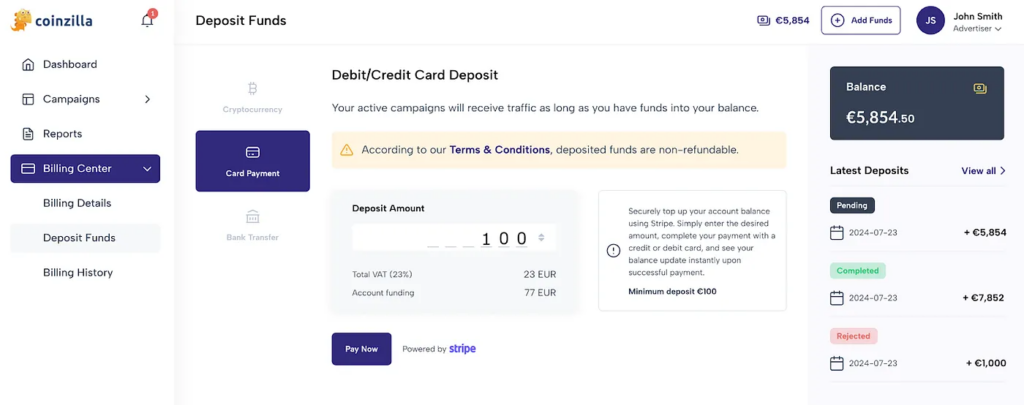
Before launching your campaign, you’ll need to top up your account. To deposit funds, head over to the Billing Center from the left-hand menu or simply hit the “Add Funds” button in the top-right corner. Once your Billing Details are complete, select your preferred payment method.
On Coinzilla, you can fund your account using:
- Crypto Deposits: Pay with a wide range of cryptocurrencies. Payments are processed through Coingate, which supports various digital currencies, and come with a 0.85% processing fee.
- Card Payments: Pay securely using your debit or credit card via Stripe.
- SEPA Bank Transfers: Direct Euro payments from your bank account.
- SWIFT Bank Transfers: For this method, you’ll need to contact your account manager and provide a few documents.
Differences in Native Campaigns Setup
If you’ve opted for a Native Campaign instead of a Display one, you’ll have a few different fields to fill in. For native campaigns, you can choose between Native Web Ads and Native App Ads, and you can probably guess what each is meant for.
Then, in the fourth step, you must add some copy and the required creatives instead of a traditional banner.
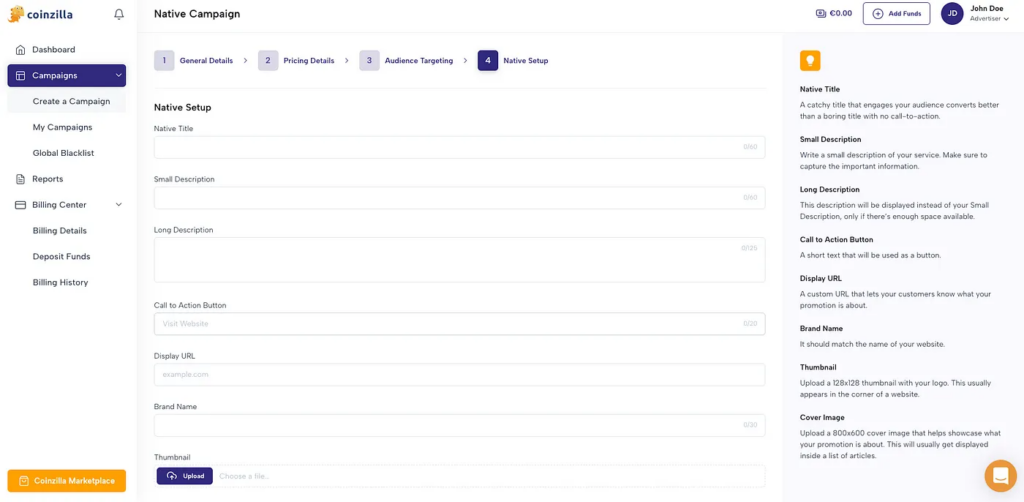
Native Title & Descriptions
The Native Title is meant to hook users in and give them a brief understanding of your ad. You can use up to 60 characters, and we highly recommend using a strong call to action and powerful words.
We have two separate description fields because websites vary in character count. Your long description (125 characters) is usually prioritized, but if it is cut off, it will be replaced by the short description (60 characters).
Therefore, we suggest crafting two similar descriptions that provide key information about your promotion.
Call to Action Button
In 20 characters, write the action you wish the audience to take. The call-to-action button will only appear where it integrates with the webpage’s design. For example, you can write “Sign up for Bonus” in that field.
Display URL
The Display URL is the URL your audience will see in the ad. This can give users a better understanding of the page you’re directing them to.
For example, instead of showing your full URL with tracking parameters, you should change it and make it more user-friendly and intuitive, such as: awesomeproject.com
Brand Name
The Brand Name will help people easily recognize your brand if they have interacted with it before. This can significantly help you if you have a strong brand reputation.
Thumbnail & Cover Image
There are two types of media files that you can upload: a 128×128 thumbnail and an 800×600 cover image. Regardless of your chosen image type, your files should not exceed 300 kB each. Ideally, you will want these two images to be very similar to catch the reader’s attention and entice them to read your copy.
Popunder Setup

Setting up a Popunder campaign is simple and similar to a display campaign. However, on the Popunder Campaign tab, you have just three sections to follow: General Details, Pricing Details, and Audience Targeting.
For any information related to these sections, see the explanations needed to create your campaign above.
Banner Preview
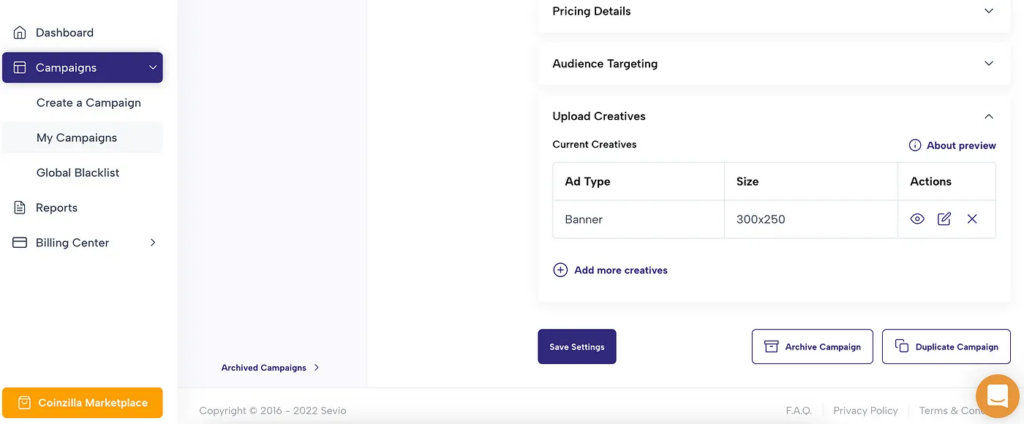
After you create your campaign, it will be pending approval. In the meantime, you can preview your creatives. Access the My Campaigns tab, select your campaign, scroll down to the Upload Creatives section, and click on the View Current button to see how all your ads will be displayed on a website.
You can examine your banners on both desktop and mobile by changing the view from the top-right icons.
The view will automatically adapt based on the banner you’re trying to preview. For example, if you’re previewing a Medium Rectangle Banner (320×250), the preview can be adapted to desktop and mobile screens.
If you didn’t upload a banner for a specific position, that position would be replaced by a default image displaying the dimensions of that banner spot.
The banner will act exactly like its live version, allowing you to test the landing page to which users are directed.
You can also use the preview page sharing functionality to share the banners with your coworkers, managers, or clients. Simply click on the share icon and check the Sharing Enabled box. Once checked, anyone with the link can access the page, no login needed.
Tracking Your Campaign
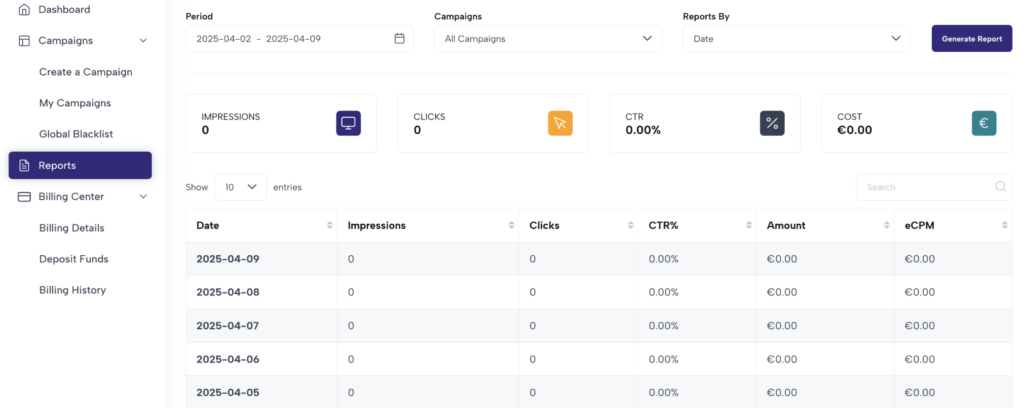
Once your campaign goes live, you can use the Reports screen to access your statistics.
This tab allows you to generate reports for your campaign, view metrics such as Impressions, Clicks, CTR, Conversions, and eCPM, and make informed decisions based on your campaign’s performance.
By accessing the reports area for a specific campaign, you can set reports by date, country, operating system, and browser. Also, by accessing that area in the Reports tab on the left, you can select All Campaigns and display all the reports of your created campaigns.
Now, go out there and start advertising!